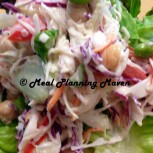
Layered Picnic Salad
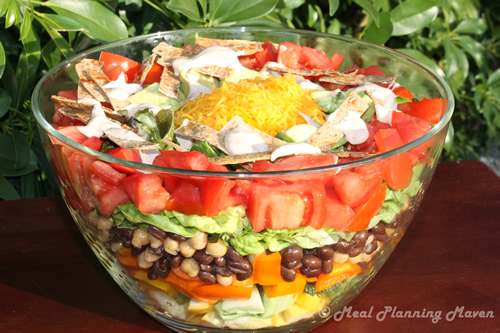
Turn back the clock with me and experience one of the most popular dishes served at community potlucks, picnics and BBQ’s years ago…the layered salad! My version is a twist on the traditional, using all kinds of summer-fresh veggies and topped with ultra-rich in taste Herbed Buttermilk Dressing . The sky’s the limit when it comes to choosing your veggies, so raid your farmers’ markets, get creative and start layering!
Ingredients
Salad
*All quantities are approximate depending on bowl size and desired number of layers
- 1 small head lettuce torn (such as butter, red and green leaf lettuces, romaine, etc.)
- 1 15 ounce can black beans, rinsed and drained
- 1 15 ounce can garbanzo beans, rinsed and drained
- 2 cups broccoli florets
- 2 cups yellow squash sliced and quartered
- 4 plum or 2 large tomatoes cut into chunks
- 3 bell peppers cut into small pieces (try to use different colors such as orange, red, yellow and green)
- 1 large ripe avocado pitted and cut into chunks (toss with lemon or lime juice to prevent browning)
- 1 1/2 cups shredded cheddar cheese or cheese of choice
- Herbed Buttermilk Ranch Dressing or Taco Ranch Dressing
- Large decorative glass bowl
- Baked Tortilla Strips for garnish optional
- 4 whole-grain tortillas
- Seasonings as desired such as sea salt, paprika, cumin, garlic powder, etc.
- Olive oil spray I love the Misto!
- Parchment paper or foil if desired
Instructions
- Baked Tortilla Strips: preheat oven to 275 degrees F. Cut tortillas into 1/2-inch strips. Then cut each strip into thirds. Arrange strips on a baking sheet. (lined with parchment paper or foil if desired) Lightly coat each tortilla strip with olive oil spray. Sprinkle with desired seasonings. Bake for about 10 minutes or until lightly browned. Watch carefully; do not allow to burn. Tortilla strips will crisp after cooling. Store in a sealed container at room temperature for up to 1 month. Delicious topping for soups, casseroles and salads! Also makes a great healthy “munch!”
- Salad Assembly: place layers of each ingredient into bowl in desired order. Top with Baked Tortilla Strips if desired. (Do not add to a middle layer as they will become soggy.)
- At serving time, either ladle dressing over the top or serve on the side.
Notes
Make Ahead and Storage: Salad can be assembled up to 4 hours ahead. Cover and refrigerate. If using avocado and tomatoes, choose these as your top layers, adding just prior to serving.
Have a blast! Choose veggies representing every color of the rainbow! There are no rules…just make sure you place your veggies in a pattern that allows your beautiful layers to be seen. Other great veggie additions to layered salads would be edamame, radishes, zucchini, green beans, carrots, celery, and sugar snaps. Switch up your beans according to preference. Red kidney beans would add a nice “pop” of color. (For fun, I mixed the black beans and garbanzos together.)
Note your bowl shape: while some bowls have the same diameter from top to bottom, others are much wider at the top. (such as the one photographed) This type of bowl will need a larger quantity of ingredients to “cover” as you work toward the top. So some adjustments in quantity may be needed. If you run short on some ingredients, you can create pretty concentric circles on the top layer. (such as shown in photograph with the tomatoes, avocado and cheddar cheese)
Want a heartier salad? Try adding a pasta layer. (Bow ties, penne, ziti or elbows are nice.) Layers of chilled cooked shrimp or chicken would also be quite delicious.
Keep your dressing creamy. To prevent your salad from becoming drenched and soggy from dressing, I’d recommend sticking with a creamy dressing such as Herbed Buttermilk or Taco Ranch.


